An AC technician handles several tasks when installing an HVAC system. Here’s a list of the key responsibilities:
-
Site Assessment:
- Conduct an on-site inspection to assess the space and determine the best location for the HVAC unit (indoor and outdoor components).
- Measure the area to ensure proper system sizing.
-
System Design & Sizing:
- Perform load calculations to determine the appropriate size of the HVAC system for the space based on factors like room size, insulation, and climate.
- Choose the right system (e.g., split system, ductless, central air, etc.) based on the customer's needs.
-
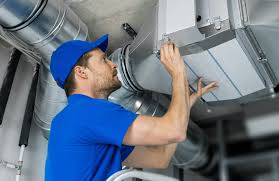
Installing Ductwork (if applicable):
- Install new ductwork or modify existing ducts to ensure proper airflow.
- Seal and insulate ducts to prevent energy loss and optimize efficiency.
-
Mounting the Indoor Unit:
- Securely install the indoor air handler or evaporator coil in the designated location, such as a basement, attic, or utility room.
- Connect the air handler to the duct system for efficient air distribution.
-
Placing the Outdoor Unit:
- Install the outdoor condenser unit in a suitable area with proper clearance and ventilation.
- Secure the unit on a level surface, typically a concrete pad or brackets for wall mounting.
-
Connecting Refrigerant Lines:
- Run copper refrigerant lines between the indoor and outdoor units.
- Ensure the refrigerant lines are properly insulated to prevent energy loss.
-
Electrical Connections:
- Wire the HVAC system to the electrical panel and install a dedicated circuit.
- Connect power lines to the indoor and outdoor units and set up the thermostat.
-
Gas Line Connections (if applicable):
- For systems that require a gas-powered furnace, connect the gas line to the furnace and ensure proper venting.
-
System Calibration:
- Test the system to check refrigerant levels and ensure everything is operating within the manufacturer’s specifications.
- Calibrate the thermostat and set it up for optimal temperature control.
-
Leak Testing:
- Check for refrigerant leaks using a leak detection tool and ensure that all connections are secure and tight.
- System Start-Up & Testing:
- Power on the system and test both heating and cooling functions.
- Check airflow, temperature settings, and humidity control to make sure everything is running smoothly.
- Final Inspection:
- Inspect the entire installation for compliance with local building codes and manufacturer instructions.
- Clean the work area, remove any debris, and ensure the system is fully operational.
- Customer Demonstration:
- Walk the customer through the system, explain how to operate the thermostat, and provide maintenance tips.
- Offer guidance on energy efficiency practices and any warranties associated with the installation.
These tasks ensure a proper and efficient HVAC installation that provides comfort, safety, and longevity to the system.